We got a call from Alice telling us that her EZ9 had recently started whistling when she walked by. (She was flattered at first, until she realized it was whistling at everybody) It had never done this before, so she knew something was wrong and that it would need to be fixed. She needed to… Continue reading The Case of the Whistling Tuttnauer EZ9 Autoclave
The Case Of The Not So Hot Midmark Autoclave
We got a call from Jeremy this morning about his M11 autoclave not working. He told us he started by selecting the “pouch” cycle. It filled with water and then advanced to the heat up stage like it is supposed to…but it never got hot…not even warm…in fact, there was no heat at all!… Continue reading The Case Of The Not So Hot Midmark Autoclave
The Case of the Dead Statim Compressor (And How to Prevent It From Happening to Your Autoclave)
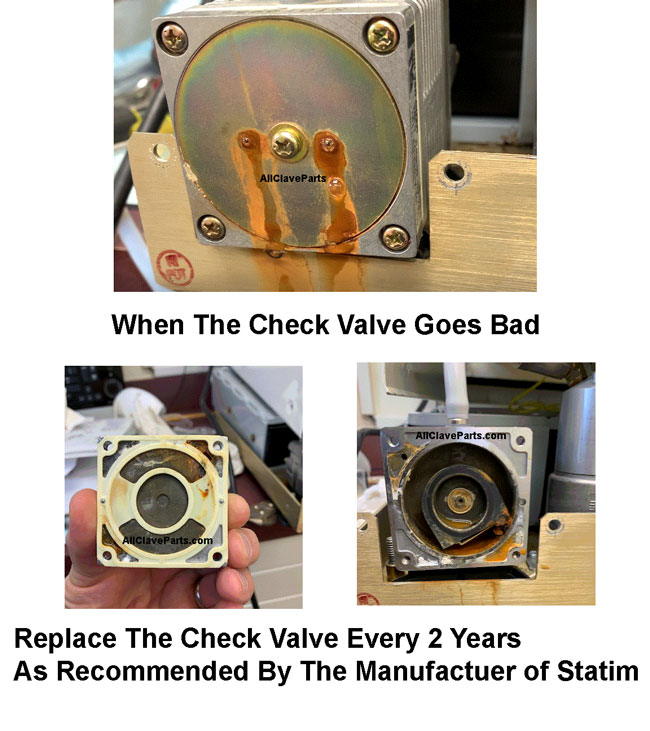
We got a call from Kevin M that the instruments he was sterilizing in his Statim 2000 Autoclave were coming out wet and there was water standing inside the cassette It was completing the cycle without any error code The first thing we had him do was to run another cycle and listen for the… Continue reading The Case of the Dead Statim Compressor (And How to Prevent It From Happening to Your Autoclave)
The Case Of the Alien Midmark Vent Valve
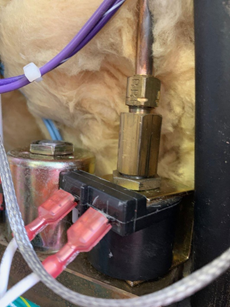
Dr B’s Midmark M9 Autoclave stopped working and was giving her the C983 error code. Not sure what to do, she called a company and received a repair estimate of more than $1500.00. The estimate included a laundry list of items that the repair company said needed to be replaced to fix the problem. Although… Continue reading The Case Of the Alien Midmark Vent Valve